Dotted Eighth Delay Studies

Setting up the U2/Hillsong delay in a variety of situations.

The Sessionists

Esther Subra (vocals), Serena Chew (keys), Justin (guitars), Alphonsus (drums and percussion)

Thoughts on G.A.S.

Why you should save up for an expensive guitar.

Setting Up Disaster Area DPC-8EZ and DMC-8D MIDI Controllers

An easy-to-follow video tutorial to get those patches programmed!

An Overview of My YouTube Channel

Feel free to browse some of the playlists on my channel. Hopefully this leads to you liking and subscribing!

Tuesday, July 30, 2013

The Sweet Presence


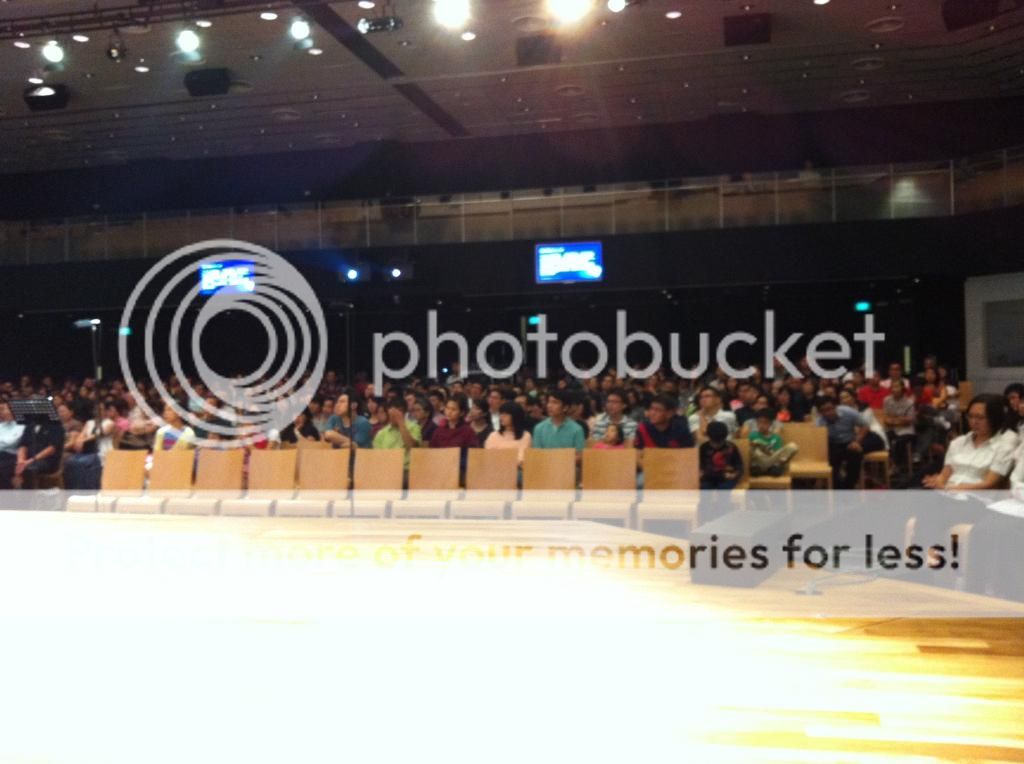
I recently played for New Heart's concert in Singapore Life Church. Dr. Yenn, Dr. Ephraim, Derrick, Tai-chi, Dickson, Ngee Ping, Joshua, Kim and Judy are such amazing people to play with. I have certainly improved my sight reading by leaps and bounds since the first day I played with them, and I am indebted to Yenn for taking me in even though I was terrible at reading scores!

My personal highlight of the concert was during a song I didn't have parts to play, so I was seated and soaking in the incredible atmosphere of worship. The song was "Chen Zhang" (trans. Maturity), in which the pre-chorus has the lyrics (and I'm trying to translate to the best of my ability),

"Maybe trials are blessings in disguise,
Without which we wouldn't have the chance to mature."

Then it happened. An indescribably huge and invisible presence seemed to permeate through the walls of the concert hall and filled up the space above me. It seemed infinitely large, and what I was compared to this Being was like a drop of water facing the entirety of the ocean.

As large as this Being was, there was no fear, just a warmth swelling up from inside my heart. I knew who this Being was. It was God. It could only be God. He has appeared to me before, in the privacy of my room, in the crowded space of an MRT train, at the communion rails in church, and now, in this concert hall.


I felt God enveloping me. And every question I had inside, questions about what was I to do with life and what was I to accomplish in His name, how was He going to provide for Christine and I, how was I going to deal with the constant opposition to ministry--they drowned in this ocean of warmth and love that wrapped me. I could have hugged God right there. I wanted to burst into song and dance, I wanted to lie prostrate before Him in worship.

God was there. And I, a child, a son, a subject of the King, a servant, could not but worship Him with all of my heart in that concert hall. I felt like I had come home. I felt a sense of completion, like every fibre of my being had finally been rid of the vile proclivities to sin, and my spirit was free to be myself--I didn't have to pretend to be this "strong male leader" type, I didn't have to carry the labels of "ministry staff" or "intern" or "crazy guy who gave up a secular job". I didn't need a thousand reasons to justify every action and decision. I just was.

I couldn't see a physical form, but I felt God's smile. I couldn't hear any audible voice, but my spirit was resonating with a phrase that was planted in my heart, "You're right where I want you to be."

21 July 2013

The day God met me.


And of course, I couldn't help but take a gear photo for the night:


After all these years, I still can rely on Line 6 gear to last the night. This is in stark contrast to what happened in JB at Full Gospel Church, where we played the week after:


Do you notice how my volume pedal is going straight into the amp, bypassing my Timeline? That's because the 9V adapter that came with my Timeline died during rehearsal, and I had to play the concert without a delay pedal. Note to self: bring extra 9V adapter just in case.


Thursday, June 6, 2013

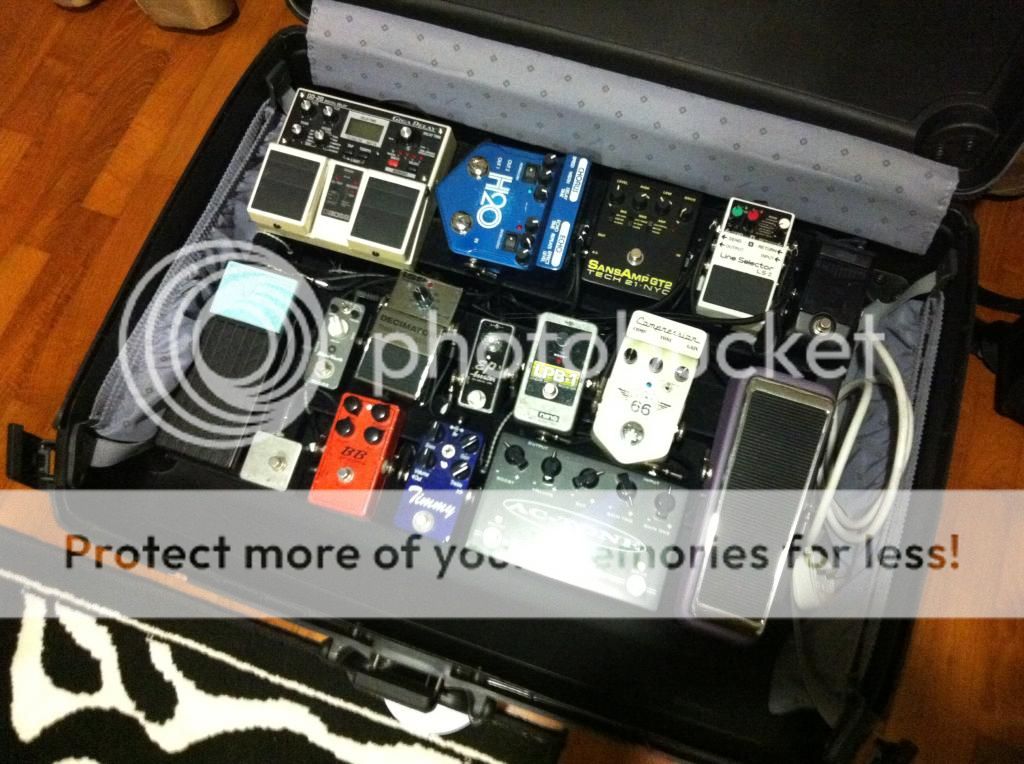
A DIY Flight Case

I totally stole this idea off Mervin John, guitarist and band leader extraordinaire, when he brought his rig down for us to check out during our band arrangement class. If you have a heavy pedalboard, need a luggage-chucking grade case which has wheels and can be locked during transit, you can most certainly use:


I suppose I'll lose some baggage allowance and won't be able to buy back snacks for anybody when I'm away on tour, but it's a necessary sacrifice on the war on tone. There's no need to fork out $200 on a ATA flight case with wheels, save for the fact that it's probably the more elegant and pro looking way of transportation than this!

Wednesday, May 22, 2013

An Experiment in Trimming the Herd

This was a quick experiment in tone crafting:

  • What if I removed all the various power supplies and just relied on one 9V adapter like the One Spot?
  • What if I removed the Deluxe Electric Mistress (update: I sold it off eventually), which was non-true bypass and had a bulky 18V adapter?
  • What if I removed the Carl Martin AC Tone, removing the first layer of overdrive?
What inspired such a radical experiment? At the last rehearsal before Music Extravagant with YFC, Richard said to me, "The only one who's niao  (trans. picky) about your tone is you." Don't worry, he didn't say that in an acrimonious way (I think we were talking about tone requirements, and how all he wanted was only a wah/overdrive/delay sound, and anything else in the equation was at my discretion). Yes, electric guitarists tend to be very niao about tone. We think that in order to squeeze as much tone as possible out of one pedal, we need to have two to three others to complement it. How often have you heard guitarists say things like:

"Yes, that Timmy is fantastic! But it really needs an already-slightly broken up tone to really get the shimmer right. So I'm getting a TS808 before the Timmy."

"Yeap, I have two delays in my rig, each one at a different delay time so that I can get a cascade of delay tone that doubles as a reverb."

Observation #1: No AC Tone
My primary use of the AC Tone was to have the first drive always on--it was set up for a slightly-broken-up tone, like an amp at the breaking point. Without the AC Tone, it's pristine clean now, and I had to get used to that tone. And you know what? I found the clean nuances of my guitars. The distinct differences between single coils and humbuckers were so much more evident.

I was a little lost without the boost function of the AC tone (I used the boost to push my lead tone into my solo tone), but I soon replaced that with my second EP booster. Carl Martin boosts are clean and non-colored, so with an EP, the boost has an EP flavor: fat, slight-smiley face, and compressed. It certainly was very different, but definitely a useable tone.

Observation #2: No Deluxe Electric Mistress
Yeap, I knew it. The 18V adapter was the cause of hum in my rig. Removing it from the chain had a distinct clean-up of white noise, hum and artifacts. There was even a brightness in my tone that I never knew was there--perhaps my ears were too used to the tone of non-true bypass. If I were to be honest, I had the DEM on my rig more for cosmetic than tonal reasons. '70s-style flange is nice, but it's a lot harder to incorporate that in a song than the tried-and-true tone of chorus. So the verdict is final: I'm removing the DEM permanently!

Observation #3: Removing Power Supplies
By having all the pedals running off a single One Spot, I realized that there's a loss of "mojo" in the pedals that can run on higher voltages like the BB Preamp, the Timmy, and the EP boosters. They sound nice at 9V, with a sound that's more compressed and less headroom, but they sound even better when cranked to 18V. But perhaps the biggest change is that they respond differently to the use of my guitar volume knob to clean up an overdriven tone. At 18V, I seem to be able to capture the nuances of everywhere between 0-10 in small increments (0, 1, 2, 3...10). At 9V, I lose that subtlety and it sounds like I can only vary from 0-10 in bigger increments (0, 2, 4, 6...10).

That being said, the removal of the DC brick helped to reduce the noise in my rig. It's dead quiet! It appears that I can only have one or the other: magic with noise, or less magic with no noise.

Summary
I need more tonal variation. While having a pristine-clean tone is nice, I'd rather have the first-layer overdrive of my AC tone to add some dirt into the next few overdrives. Stacked overdrives to my ears just sounds nicer than single-overdrives. I also can make do without the DEM, which will free up the space on my pedalboard and reduce the noise significantly. Finally, I will put back the DC brick so I can run the overdrives and EP boosters at 18V to have the extra clarity, headroom and "mojo".

Thursday, May 2, 2013

Cheap and Good

2013-05-02 065538

I know, I know. I said I’ll stop my GAS. I know I was quite proud of the fact that I managed to cut my pedalboard down to  size that I could get away with a single One Spot adapter. However, I ran into a few problems with the reduced setup:
  1. Without my AC Tone, my clean tone was “too clean”. I actually do like some dirt as a clean tone, using my guitar volume to adjust. With this as my first stage overdrive, I’m able to crank a bit more hair out of the Timmy and the BB. They also sound their best if the foundational tone has some dirt.
  2. Without my DC Brick, I had to run everything at 9V. To my ears, the BB and Timmy have the best mojo at 18V.
I also wanted to achieve the following tone goals:
  1. The AC Tone has a great boxy roar when cranked really loud, but I don’t play or practice at venues where I’m able to push amps to that kind of volume without receiving complaints of some sort. I also sold off one of my EP boosters, so I had no way to get the cranked Vox AC-30 tone. I wanted a boost pedal that was different to the EP booster.
  2. I wanted to get a reverb effect similar to the Shimmer effect but I can’t justify spending so much for a Strymon Blue Sky or Timeline. I also only had enough space for one more pedal, and it had to be sized like the EP booster.
  3. I wanted switching capability with my rig, and a 2-loop pedal meets my needs.
So, with these goals in mind, I set out to prowl the forums on SOFT and found:
2013-05-02 065547

Electroharmonix Linear Power Booster LPB-1
This boost pedal doesn’t sound good on its own. It’s quite a bright boost pedal, quite distinct from the EP booster, and sounds best when used on an already overdriven tone. Even though I’ve been advised to put this post-overdrive, I wanted to keep the EP booster as my post-drive booster to fatten the tone, so I put the LPB-1 pre-overdrive and compensated for the EQ on my overdrives. I’ve set it up for a subtle crank, but if need be, I could really get my overdrives to scream by turning it to 12 o’clock. This could be useful for low-output pickups like on my tele.
2013-05-02 065555

Mooer Shimverb
Don’t be too dismissive of this Chinese product. It has its own version of the Shimmer effect, distinct from the Strymon and Hardwire tone. Its algorithm is set to 5th’s instead of an octave up, and this has been a source of complaint among Shimverb users who say that the pedal is “hard to use”. To me, reverb effects are not supposed to steal the limelight from the tone of the guitar. With an algorithm set to 5th’s, you should be thinking that the tone is going to be thicker than an algorithm set to an octave up. The Shimverb Shimmer sounds best when the effect level is set to 10-11 o’clock and the decay level set anywhere between 12-3 o’clock. This disguises the overtone so you can’t tell that it’s set to 5th’s, which will be helpful since playing diatonically will land you in intervals where the 5th sounds “wrong”.
So in summary, the Shimverb doesn’t make you out-of-tune. It makes you out-of-key, and  that can be a cool thing depending on the musical situation.
2013-05-02 065605

Boss Line Selector LS-2
The problem with basic loopers is that they don’t have internal buffers to adjust the volume of individual loops to compensate for volume differences. With the LS-2, even though the pedal isn’t “true bypass”, I’m able to adjust loop volumes to taste. I have my entire overdrive section on Loop A (I haven’t set up Loop B—maybe if I get more pedals!) so that I can get a clean sound with one stomp, instead of having to tap dance.

What I want to try next is to set up a mix of A and B, which in theory will allow me to blend clean and overdrive signals together like the Clean control of the Voodoo Lab Sparkle Drive. Or, I could put the Shimverb in Loop B and control the mix by boosting or cutting the buffer volume while having the overdrives in Loop A. I’ve tried having the Shimverb track an overdrive tone, and I believe it does a better job on a clean tone instead.

Now the only problem with this monstrosity of a pedalboard is that it takes up 3 types of power to run it—I power the 18V and a few of the 9V pedals with the DC Brick, some of the 9V pedals with my Mooer power supply, and the AC Tone runs its own power on 12V. I velcro-ed a 3-way multiplug adapter to the bottom of the board to accommodate these, and I think it’s adding some noise to the signal. All-in-all, it's manageable; I only have major noise problems occasionally.

UPDATE

With an additional trip down to SV guitars, I obtained enough patch cables to set up the second loop!


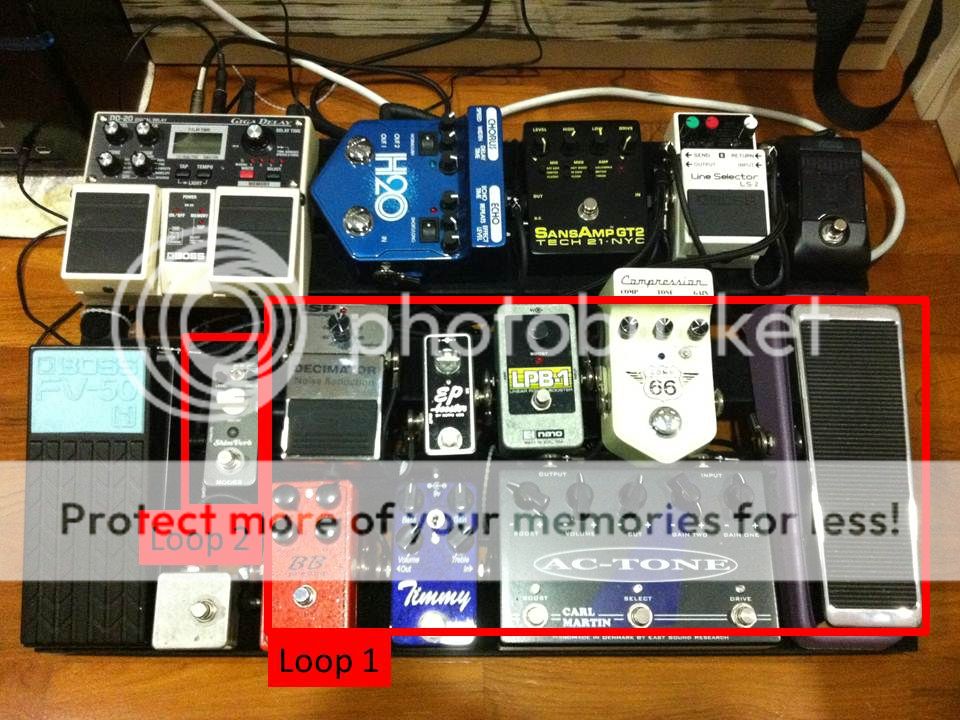
Loop 1:
Wah -> Comp -> LPB-1 -> AC Tone -> Timmy -> BB preamp -> EP booster -> ISP decimator
My entire overdrive section is now in one loop, so I'm able to go from overdrive to a clean bypass with the click of a switch. With my volume pedal now after my amp sim and before my delay pedals, the volume pedal is now a master volume, something that I couldn't do until I got a hold of longer patch cables.

Loop 2:
Mooer Shimverb
After trying out places to put the Shimverb, I have settled on placing it in Loop B for a few reasons:
  1. There is a discernable drop in volume when engaging the Shimverb. By putting it in the LS-2 loop, I'm able to give a slight volume boost to compensate.
  2. When engaged, the Shimverb very quickly steals the limelight of the signal, and the guitar tone is instantly swept up in the "wash" of the shimmer effect. I set my LS-2 to run on A-B-Mix, which means the signals of Loop 1 and 2 are superimposed. I can now have a clean tone on Loop 1 with compression and some EQ tweaked from the EP booster (the Shimverb does have make some strange sounds when a compressor and EQ is in the mix) while having an effected signal in Loop 2.
  3. When I turn the Shimverb off, Loop 2 becomes clean and dry. As a fan of the Voodoo Lab Sparkle Drive, now I can utilize Loop 2 as a "boosted direct signal" which, in the words of the good people at Voodoo Lab, "restores the attack and feel which is lost in a highly compressed overdrive circuit."

Sunday, April 14, 2013

A DIY Pedaltrain Nano

IMG_0365

The laptop cooler in office finally died, and I was about to just use it as a laptop riser when I realized it has a nice elevation angle that’s similar to a Pedaltrain. I wanted to get a Pedaltrain Nano for my jam sessions where I only really needed the amp sim and a delay (and I figured out that even that’s a bit much for a simple jam. I’m currently looking for a smaller delay pedal).

So I found some leftover velcro from my Pedaltrain 3, found my spare patch cables, spare power supply and daisy chain, and started putting them together with three of my most important pedals: my Pitch Black tuner, SansAmp GT2 and Boss DD-20. To take the DIY approach even further, I found a spare projector case and found that it fitted the pedalboard really snugly:
IMG_0367
IMG_0366
Compared to a Pedaltrain soft case, this projector case has more storage space for cables, the power supply, and I could even put in a DI box. All-in-all, this was quite a fast DIY build, as the materials were all readily accessible.

Friday, March 22, 2013

The Memories of IRC

I recently installed a chat box onto my blog page for fun. Remember the good 'ol days of IRC? I thought I'd try to be more interactive by allowing a public chat box for people to interact, discuss, and share their thoughts. You'll find a link to my Contact page here:

http://coffeeholicsstudios.blogspot.sg/p/contact-me.html

Try it out, and let's see how this goes!

For further action:
Get your own chat box!

Friday, March 15, 2013

Consumed by Your Hobby

Last week, my M-Audio Fast Track Pro audio interface died on me. It can’t be revived, and the technician I called quoted a repair price that was higher than what I bought it for. I thought I would have flipped out—this device has been a part of my musical life for quite a while. But strangely enough, I only experienced a little sadness, nothing beyond that. There’s a certain level of peace that God gave me, and I was content to trust in God’s timing for a new interface. 

Do you know of people who get distressed when an object of their hobby gets spoilt? I know a few (tennis players and their rackets/audiophiles and their speakers/grease monkeys and their cars). They become possessed! They can’t find rest until their hobby is restored to its original state. They lose sleep over sourcing for parts. They get stressed at having to choose between several vendors offering different quotes. 

While it’s not wrong to feel stressed or annoyed when things get spoilt, I think there is a line beyond which our hobby becomes more than just a pursuit outside our regular occupation. Paul wrote this, “And whatever you do in word or deed, do all in the name of the Lord Jesus, giving thanks through Him to God the Father” (Colossians 3:17). He also wrote, “Whether, then, you eat or drink or whatever you do, do all to the glory of God” (1 Corinthians 10:31). The true barometer for our hobbies should be whether or not they glorify God, whether or not we see them as gifts from God for which we are thankful, and whether or not they draw our attention away from Him. 

Even the most innocent hobbies that consume us are encumbrances that we must lay aside because they slow us down in our race which is the Christian life (Hebrews 12:1). A good test is this. How important is this hobby to me? Is the Lord alone enough? If it were stripped away from me, would I still be content in Him? So, if something gets spoilt, by all means, get it fixed! But don’t let your possession possess you. The Lord is truly and verily enough for you.

Thursday, February 28, 2013

Jailbreak Adventures: WhatsApp on iPad, iOS 6.1


One of my biggest goals of jailbreaking the iPad was to be able to use WhatsApp on it. As you know, the messaging client only works on mobile phones, and the key to installing WhatsApp is to trick it into thinking that it is operating from a phone, and not a tablet. 

Here's what I did to install WhatsApp on iOS 6.1.

Step 1: Download and install the latest version of WhatsPad from the Cydia store.

Step 2: Download the latest WhatsApp.ipa (at this point of publication, it's 2.8.7). The iPad is smart to the point that it recognizes older, outdated .ipa installation packages. If you try to run anything older than 2.8.7, the iPad will bring up a "Please update to the latest WhatsApp" error message.

Step 3. Connect your iPad to your computer. Use a third party installer (like iFunBox) to install the .ipa package onto your iPad.

Step 4. You now have the app on your iPad. Now you need to verify your app. Verification requires you to key in a code that will be sent to a mobile number. This is the main problem with installing WhatsApp on iOS6.1: you need a working mobile number just to verify the app. You can't escape the verification by putting in a house or office number.

Step 5: This next point is very important. Do not use your own phone number to verify if you already are a WhatsApp user! If you do, your existing WhatsApp will be logged out--removing you from every chat group that you are a part of and erasing your chats. I learnt this the hard way, and I don't want anyone else to suffer! Use a spare mobile number to verify the app. My mother is a technophobic retiree who will never touch a smart phone, so I just used her mobile number.

If you really want to, I suggest buying a pre-paid SIM card for the sole purpose of verification. Yes, I know it doesn't make this method free, but I think the benefits of having WhatsApp on the iPad more than make up for the cost involved.

I have hosted the latest WhatsApp.ipa package here for your download.

You might want to improve the experience of WhatsApp on the iPad by using either of the additional tweaks below:

RetinaPad - You know how the 2x view of iPhone apps on the iPad look grainy and reminds you of your old Gameboy display? This tweak fixes the display by correcting the distortion and making your iPhone apps look it's in HD on the iPad.

FullForce - This tweak forces an app to conform to the dimensions of the iPad's display dimensions and uses the native iPad keyboard (instead of the iPhone keyboard).

For further reading (legacy methods):

Installing the WhatsPad tweak (Redmond Pie)
Using iPhone configuration utility (Justin.my)

Jailbreak Woes Part 2: When Apps Crash on Loading

I used iMovie for a good part of an afternoon to film and edit clips. It was easily 3 hours worth of work, and I was wrapping up the day's editing and ready to export my videos.

The unthinkable happened. I exited the app to check out my Whatsapp messages, and when I tried to re-open the app, it just won't open. Every method I tried resulted in the same result: app crash! I tried to kill the app from the app switcher and re-open the app. I tried soft resets, hard resets, using iCleaner, checking out if files were corrupted using iFile...everything didn't work!

Then the thought occurred to me that maybe it was crashing because I was working on a new movie project, I wasn't satisfied with the clip, removed the clip (so the project board was empty) and exited the app at the same time. This meant that iMovie was trying to save a project that had an empty project board.

So I rebooted my iPad in Safe Mode--and it worked! I could load iMovie without it crashing on me. And true enough, the project I was working on was empty, as the title screen for that project was showing a total duration of 0:00. I removed that dud project, exited Safe Mode, and I was back in business.

Safe Mode. It really works.

And here's the video I was making that started with a dud project board:

How to spot a vintage stratocaster

Thursday, February 7, 2013

Jailbreak Woes: Removing Siriport from iPhone


No sooner had I started to jailbreak iOS 6.1 did I encounter numerous problems. Well, it's mostly my fault. You see, in my zeal to squeeze the most out of my device, I end up trusting questionable sources. For a long time, I wanted to have Siri on my iPhone 4. In case you don't know why iPhone 4 doesn't have Siri, that's due to the fact that Apple's A4 chip doesn't have noise-cancellation. This was only implemented with the A5 chip, which was introduced in the iPhone 4s. That makes sense, as you need Siri to understand what you're saying amidst background noise.

So I went and searched for a way to get Siri onto my iPhone 4. There are workarounds, but I wanted the real deal, and hence settled for Siriport. What I didn't know was that Siriport was a pirated version of the official Siri (there's a lengthy article on the specifics behind Siriport's architecture and how it works, but that's beyond the scope of this post). I followed the instructions to get Siriport, resprung my phone, and I managed to get my phone into an infinite boot loop. This is where the apple never moves!

Of course, I panicked. But there is always a solution to get a phone out of the infinite boot loop. The problem was that there was no way to access the phone's file system while the phone is essentially a brick...or was there?

Enter iFunBox. This third party desktop software helps to install .ipa packages onto the iPhone, and it still can connect to a phone that's in an infinite boot loop. The only problem I faced was that when I connected the phone with a USB cable, iFunBox would sometimes either lose connection or not connect at all. If you are experiencing this, be patient; you are trying to fix a (temporarily) spoilt phone.

Removing Siriport and Breaking Out of Infinite Boot Loop

What you need: iFunBox and a USB cable.

Step 1: Connect the phone to your computer with the USB cable. Run iFunBox.

Step 2: Find the Raw File System folder, and go to the /System/Library/LaunchDaemons folder.

Step 3: Open the com.apple.SpringBoard.plist in Wordpad.

Step 4: Remove the following

EnvironmentVariables
        DYLD_SHARED_CACHE_DIR 
                 /var/siriport.ru/Cache4SDYLD_SHARED_CACHE_DONT_VALIDATE
1 DYLD_SHARED_REGION private


Remember to save!

Step 5: Go to the root folder (Raw File System), do a search for Siri, and delete the files and folders that are associated with Siri.ru. There should be 14 items of files and folders to delete.

Step 6: Disconnect your phone, and do a hard reset (hold the home and power button, release when the Apple logo comes up). Your phone should be back. If not, repeat the whole process again--I had to try this 3 times, and the hard reset took roughly 2 minutes.

Lesson learnt: Never trust dodgy sources!

Resources

Twitter Delicious Facebook Digg Stumbleupon Favorites More