Dotted Eighth Delay Studies

Setting up the U2/Hillsong delay in a variety of situations.

The Sessionists

Esther Subra (vocals), Serena Chew (keys), Justin (guitars), Alphonsus (drums and percussion)

Thoughts on G.A.S.

Why you should save up for an expensive guitar.

Setting Up Disaster Area DPC-8EZ and DMC-8D MIDI Controllers

An easy-to-follow video tutorial to get those patches programmed!

An Overview of My YouTube Channel

Feel free to browse some of the playlists on my channel. Hopefully this leads to you liking and subscribing!

Tuesday, December 10, 2013

Using Instagram as a Gear-a-holic

I was never one to use Instagram until I started following Matthews Effects and Pedal Projects. These guys post regularly on Instagram as one of their main communication streams to update customers (and fans like me) on their recent work, news, developments, and general updates. They are able to get instant notifications on comments and can respond very quickly to specific posts. I think it's a novel way to use social media to keep in touch with your clientele, especially since guitarists are naturally tech-savvy people!

How does it work?
Like other social media sites, the @ and # tags are integral to the use of Instagram. @ tags are for users, and adding them into both your caption and your comment section will push them a notification that they've been tagged (depending on how they've set up their notifications on their smart devices). This is useful for starting conversations or to "forward" a post to a friend who might be interested in it.

For example, I post a picture of my rig just before a gig:


And if Friend A wants to let Friend B in on the photo, he'll post in the comment like:

"@FriendB check out this guy's EHX LPB-1 and Mooer Shimverb!" (Ok, terrible example, but you get the picture)

Hash tags (#) are to include topics in a post, which will make it searchable by other users. Gear communities like @Gearaholic, @Knowyourtone and @Toneheaven encourage users to # them, which effectively shares the post with the wider community. # can also be used in both captions and comments. Here's a list that I currently use, and feel free to use them in your own posts!

#geartalk
#pedalboardfrenzy
#gottone
#gearaholics
#knowyourtone
#worship
#tonefordays
#toneheaven
#gearwire
#thisismypedaltrain
#globalworship

I see Instagram as a great way to:

1. Get pedalboard ideas
I got quite a few build ideas with my Pedaltrain PT-3 from searching up other users. This can go horribly wrong because it may stir up the GAS in you, so ogle with caution! 

2. Meet other guitarists/pedal makers/manufacturers
I love my country, but it's so small that the gear market only carries "mainstream" stuff. With Instagram, I'm able to contact the makers directly, and they're such a joy to talk to! Notably, Rick Matthews from @MatthewsEffects and Asgeir Helgi from @PedalProjects are great people.

3. Posting/hearing gear demos
@GearDemoGram and @PedalProjects are good examples of how the short video function in Instagram can be used to demonstrate gear, using the iPhone audio as a gauge. I know, it's not the best of audio, but it's decent enough to hear 75% of the pedal's "vibe". It's inspiring me to make use of this medium to 

4. Participate in competitions, give-aways, sales
Boutique pedal makers and mainstream manufacturers make use of the holiday season (or when they're in a good mood) to promote their wares. Most of them require the simple procedure of # the relevant topic, like #trexgiveaway, and tagging other users as a shout-out.

So, if you're a guitarist and want to tap into social media, why not give Instagram a spin? Find me @justicepao (it's the nickname I used when I played DOTA back in my uni days)

For further reading:

Thursday, December 5, 2013

The Feel of an Amplifier


I never had a noise issue with the neighbors. When I was starting out, I learnt to shred on a PODxt played through my computer speakers, so the volume was always under control. When I now have the room space and the funds to purchase an actual amp, I seem to have outgrown my shredder phase, and by association, the need for a tube amp.

That being said, I have experienced the joy of a tube amp at its sweet spot. And sometimes, those sweet spots are unavoidably loud. I fondly remember a day in Sydney when I heard an authentic early-era Marshall (with the block logo!) with KT-66 tubes in it. The shop owner grinned at me when I enquired about it and said, "Get ready to hear how heaven sounds like!" It was non-master volume, and when he strummed that E major chord, I almost nearly thought I saw a reinactment of the famous guitar-amp-sends-Michael-Fox-flying scene. Except there was no broken glass. Or people flying.

Amps are made to be loud. The one aspect of playing through an amplifier that digital modeling cannot capture is the feel of the amp, when the speaker and cabinet vibrate, transferring that mechanical energy to the surroundings.

I can think of three contributory factors to the feel of an amp:

1. Cabinet size. Closed-back, open-back, speaker configuration of 1, 2 or 4, cabinet material, whether the cabinet is enclosed with the electronics (like a combo), or separate, height and angle of elevation--these things affect how the cabinet vibrates. In my opinion, amp stands are less helpful than they appear to be. Although they help to point an amp to the guitarist, you will lose a lot of low end because the amp is no longer in contact with the ground. 

2. Power. Many of today's amps are headed towards the micro-amp head design, with smaller wattage ranges from 5W all the way down to 1/4W. Having watched these adverts, I think while the amp makers mean well and present a simple amp design, they over-simplify the role of power in an amp. A small tube amp with a small wattage will never sound big--the speakers aren't being driven hard enough (and probably not big enough either). In my experience, a guitar amp starts to truly sing when the power section runs at 30W. Remember, a tube amp running at 30W is a lot louder than a solid state amp running at 30W.

3. Speaker size. Again, as a result of the micro-amp design, the market is seeing a rise in popularity of 10" and 8" speaker cabs. Now, this is not to say that amps in small speakers are inferior, they're just different--anyone who's played a Supro amp or a Fender Champ will tell you that despite its tiny size, the amp can serve up an incendiary tone. The general rule of thumb is that the smaller the amp and the speakers, the faster the amp breaks up when the volume is turned up. And because the speakers are small, the breakup sounds different to a larger cab being driven hard. Both kinds of tones are palatable and definitely usable; it's just a matter of taste.

For further reading:

Wednesday, December 4, 2013

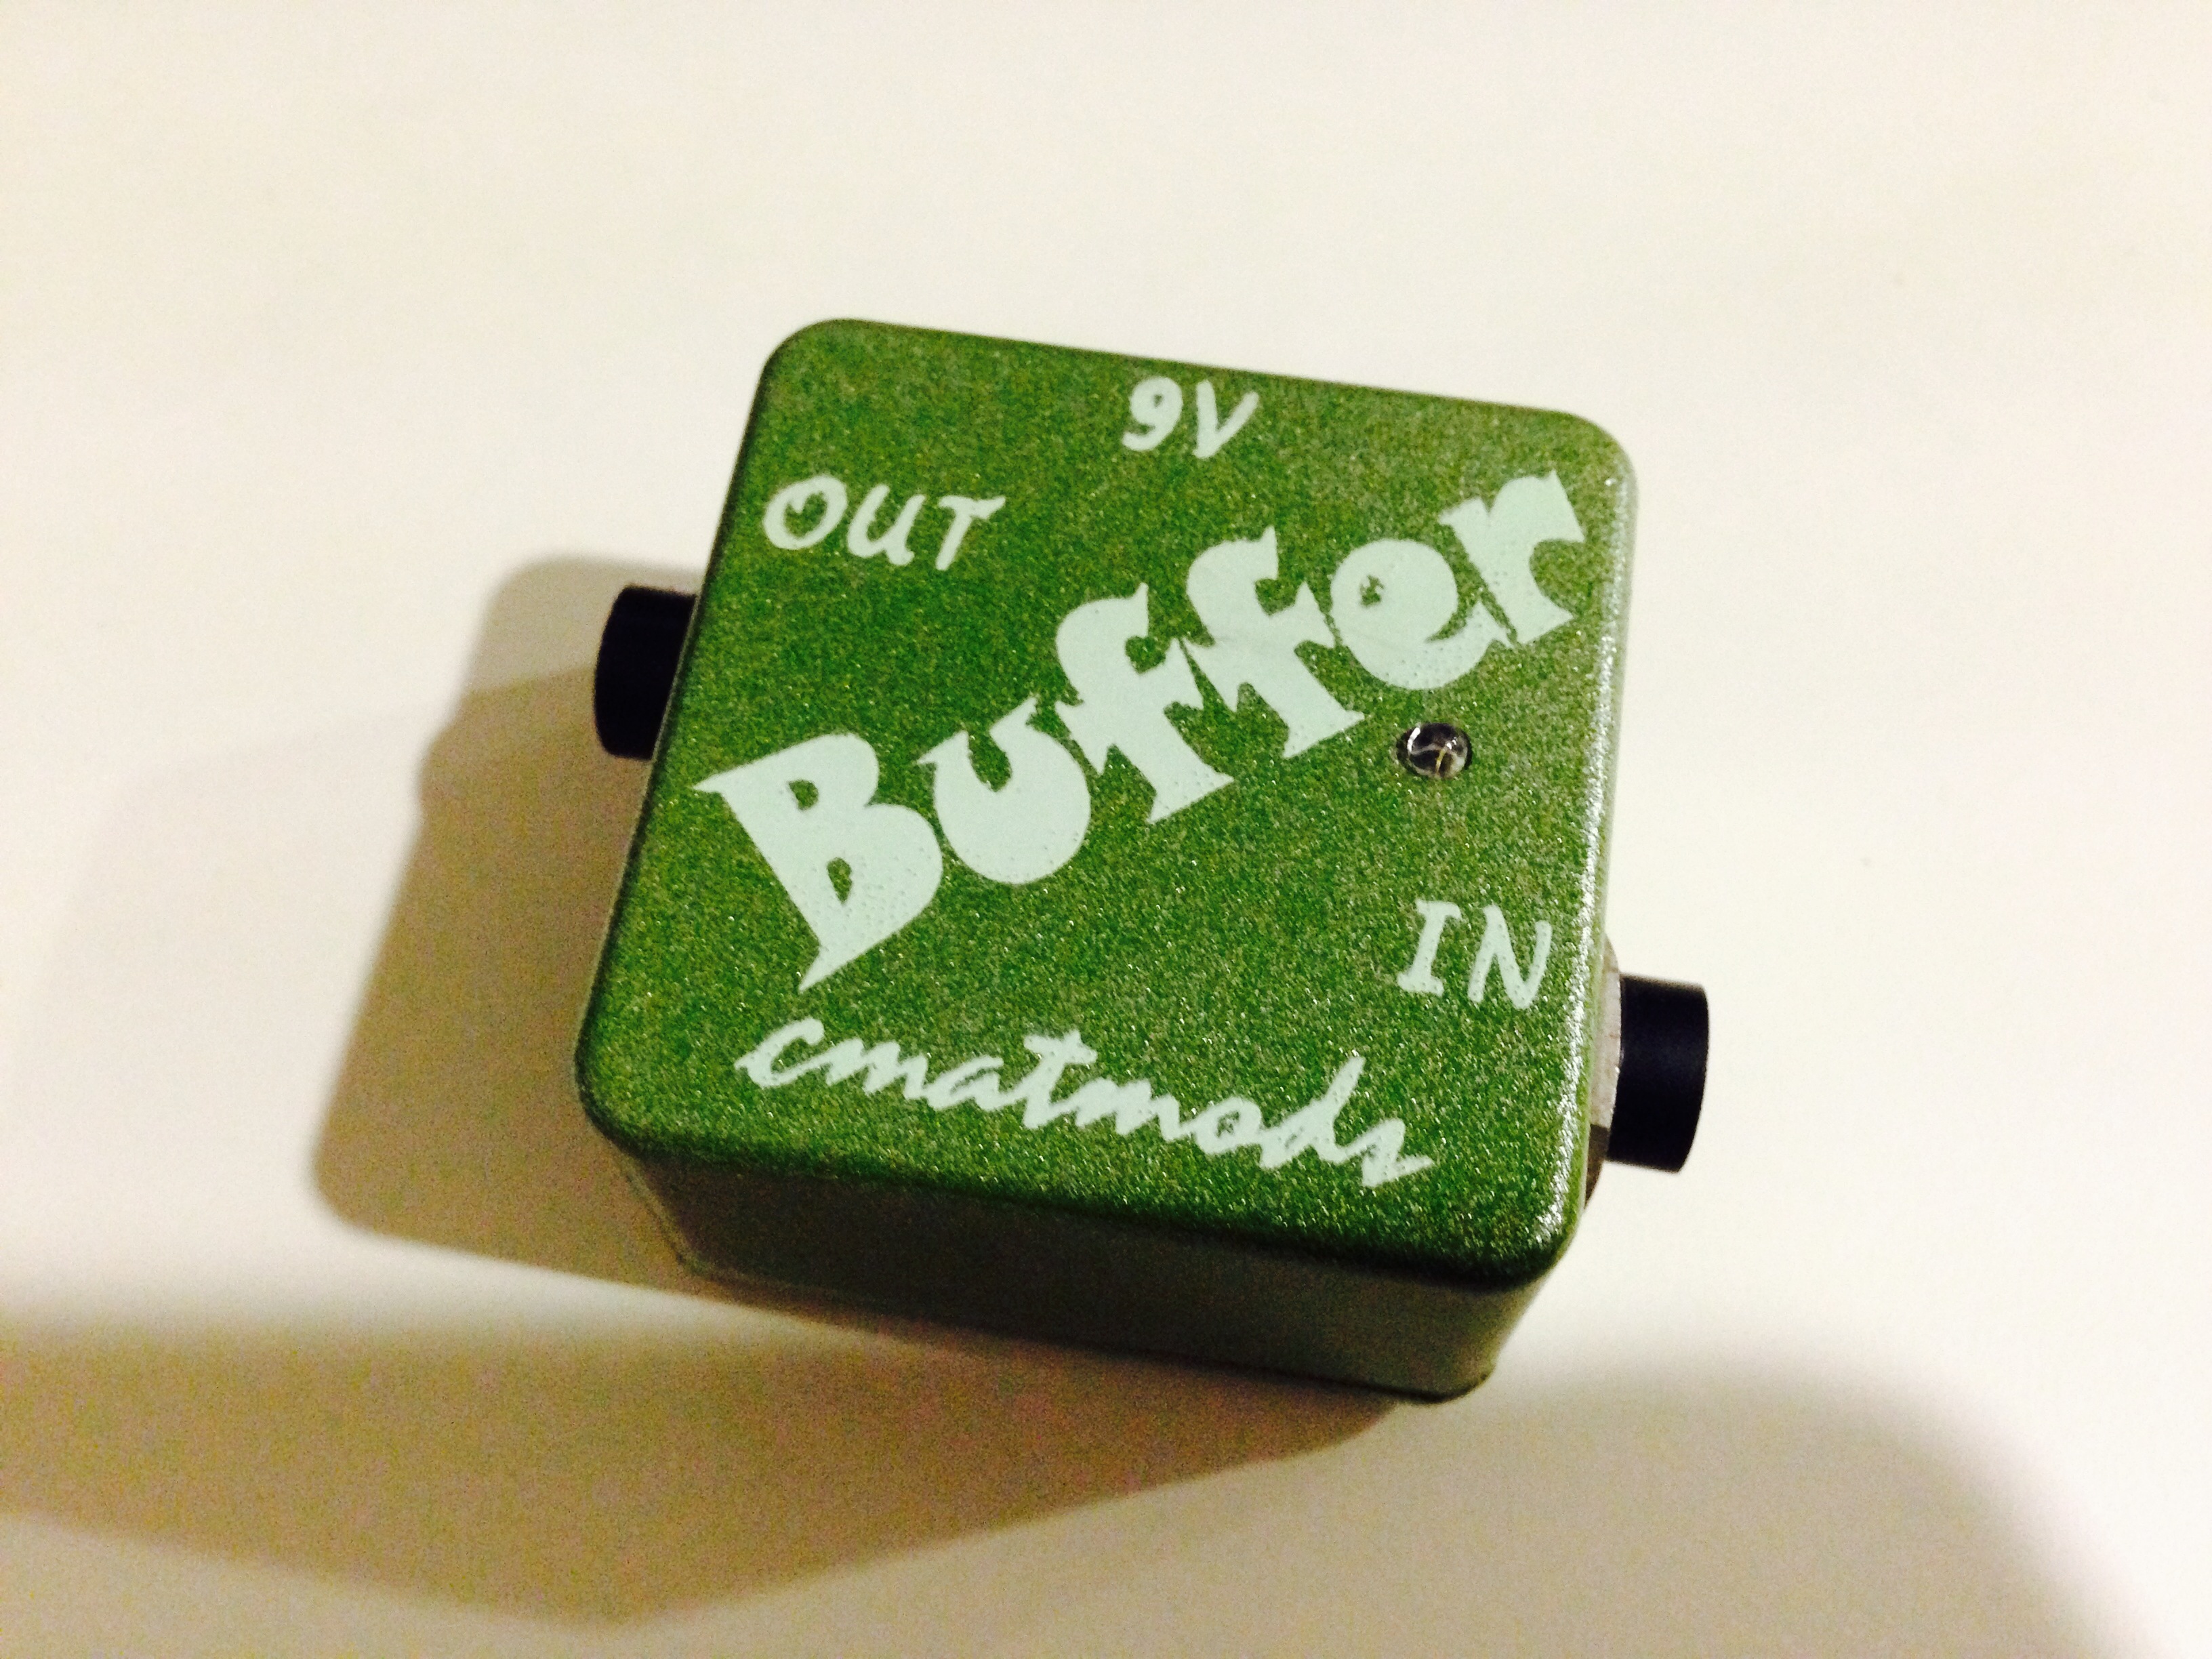
CMAT Mods Buffer Test

I just got a hold of a CMAT Mods Buffer, a tiny little green pedal that I've mounted to the underside of my pedalboard using velcro (it seems to hold well with the patch cable tension).


I conducted a test to check the effect of a buffer. I only changed the placement of the buffer, and the test was as follows:
  1. The pedalboard without the buffer
  2. The buffer placed at the front of the pedalboard
  3. The buffer placed at the end of the pedalboard


I couldn't tell that there was as significant improvement with my tone, possibly because I have Visual Sound and Boss pedals on my board. These pedals are buffered-bypass, which means that when the pedal is disengaged, there is a buffer that will be engaged to lower the impedance of the guitar signal. That being said, there is a difference in tone:

  1. Without the buffer, my tone seems darker and warmer--certainly the kind of tone I'm very used to.
  2. With the buffer in front, my clean tone has a brighter sparkle to it. The overdriven tones have a tad more brightness to it, which is usable.
  3. With the buffer at the back, the clean tone is slightly more bright, but still has some measure of warmth. The overdriven tones also have a bit more sustain (something which the previous owner told me would happen if I placed the buffer at the end of the chain).
So, with the three possible configurations, I decided on putting the buffer at the back. I like warm, clean tones that aren't too overly bright, and I like the effect of the buffer increasing the sustain of the overdriven tones.


For further reading:
CMAT Mods Buffer Product Page
Boss article on buffered-bypass

Twitter Delicious Facebook Digg Stumbleupon Favorites More