Dotted Eighth Delay Studies

Setting up the U2/Hillsong delay in a variety of situations.

The Sessionists

Esther Subra (vocals), Serena Chew (keys), Justin (guitars), Alphonsus (drums and percussion)

Thoughts on G.A.S.

Why you should save up for an expensive guitar.

Setting Up Disaster Area DPC-8EZ and DMC-8D MIDI Controllers

An easy-to-follow video tutorial to get those patches programmed!

An Overview of My YouTube Channel

Feel free to browse some of the playlists on my channel. Hopefully this leads to you liking and subscribing!

Showing posts with label Photography. Show all posts

Thursday, February 21, 2019

Dinner at Saveur (Purvis Street)


These were taken with my new Canon EFS 10-18mm STM on my 600D. Apparently, ISO on a digital camera is not a "real thing", in that the brightness setting on a photo is post-processed. Taking a picture at ISO100 is apparently the same as taking it at ISO1000, just that at the higher ISO setting, the camera bumps up the brightness for you.

The limitation of shooting at a low ISO should be fairly obvious--your unprocessed images on the camera will be really dark, and you won't be able to tell very clearly if you botched the shot. But seeing as to how my lowly 600D has terrible ISO tolerance (anything higher than 800 and the grain is intolerable), I took a gamble. All these shots were taken at ISO800, 1/50s, and at f stops f/4.5 to 5.6, and on my camera, they were really dark.

All I did was raise the exposure of the photos in post, some with 0.5 stops of light, to 2 stops of light. Not too bad looking. But this still cannot beat my 5D Mark II.

Monday, January 29, 2018

An Olympus E-PL1 in 2018?

I recently ran into a photographer whose work I respect at a party. I'd have expected him to bring his crazy rig along, but he arrived with a Sony P&S camera, citing weight and usability for his girlfriend as factors for avoiding bringing a Sony A7RII.

I have a beat-up Olympus E-PL1 that I primarily shoot with a Panasonic Lumix 14mm f2.5. Playing with P mode, I tried to see how low I can go with ISO. The following shots were progressively stepped down from 800 to 200, and finally to 100:


Not bad at ISO100! It definitely looks like daylight is the best time to use this lens and body combo. I have found that anything above ISO800 on the E-PL1 makes things too grainy.

One of the major reasons why I got the E-PL1 in the first place was to use its Art filters. This is the dioarama effect, and it's pretty cool with the wide angle possible with the 14mm!


Again, this was mostly possible with daylight. I suspect it will be a much different story in low light. Will try it out more!

Thursday, June 28, 2012

Return of the PEN


I learnt a valuable lesson when handling cameras, and I learnt it the hard way. I wanted to do a self-portrait for the purposes of updating my resume and professional profiles, so I used a tripod to prop my Olympus PEN up. Unfortunately, I must have extended one of the legs shorter than the others, and as such, when I released my grip on the tripod, the inevitable consequence of gravity taking over happened:

The camera fell facewards towards the ground. Before I could react, it had already landed squarely onto the lens with an audible crack. It was disheartening when I inspected the damage: the lens was bent (M.Zuiko lenses have an inner/outer shaft assembly to zoom), the motor was stuck, and the focusing ring was jammed. In short, I transformed a 14-42mm zoom lens into a 25mm out-of-focus prime lens.

At least the lens bore the full brunt of the damage. The body miraculously had no scratches or dents, and it could still take pictures, although I couldn't tell if the camera functions were working properly since the lens was out-of-focus.

With much thanksgiving, someone with a spare lens responded to my shout-out on Facebook (social media does have a use after all), and it was a fantastic 14-42mm Mark II! With a slimmer profile, a faster focusing motor, and a refined lens construction which made images sharper, I found a new-found obsession to using my PEN. Here's a sample of shots taken:


I admit, I'm primarily a P shooter, which I think is automatic on steroids. These were taken outdoors under shade with ISO 400. With plenty of light, this ISO could freeze our laughter (captured brilliantly by Julia!).


Indoor shots with ISO 800 had a little more grain to them, but I had to crank it up to counter the darkness of the stage (our church meets in the cinema, and the only source of illumination are a pair of stage lights that are point, strong sources of light). Even at this ISO, I could not eliminate motion blur:


It seems that this Mk II lens does not perform as well as its previous incarnation in low-light situations, but I suppose there must be a trade-off somewhere. I'm going to buy this lens off you, Uncle Michael! Thanks heaps for helping me return my PEN to service.

For further reading:
Olympus M.Zuiko 14-42mm Mk I vs 14-42mm Mk II

Saturday, May 12, 2012

Photo Tip: Avoiding Barrel Distortion in Zoom Lenses

I'm doomed. I got myself into a new expensive hobby--photography! I got myself a Canon EOS600D, and quickly acquired an 18-55mm, a 50mm/f1.8, and a Nissin flash. Here's a quick and interesting lesson I learnt from our resident photographer, Rinaldo Ackbar, about zoom lenses:

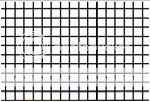
A perfect lens would render straight lines as straight, no matter where they occur:


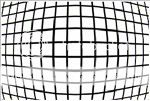
Most practical lenses fall short of perfection and instead bend lines outwards (barrel distortion) or inwards (pincushion distortion). This is how barrel distortion will be perceived:


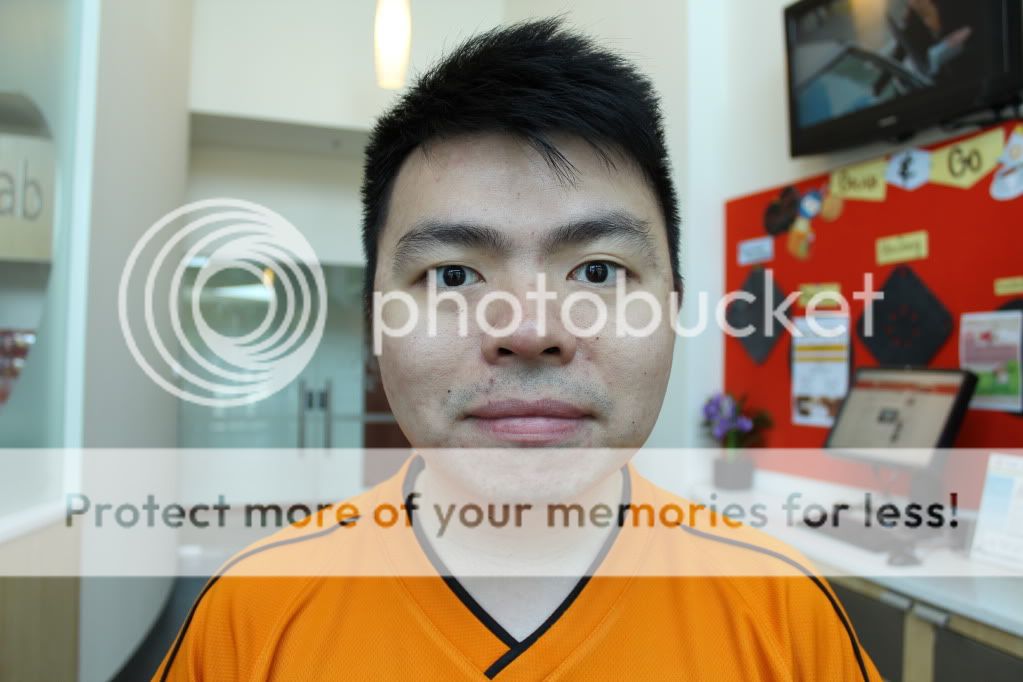
Why is this important? Well, the human brain is remarkably good at recognizing human faces, and can readily detect when someone has gained or lost weight, for example, just by looking at the face. The same is true for geometric distortion. Here's an example of barrel distortion when taking a portrait shot at 18mm:


This is not particularly flattering (except perhaps if the intended creative effect is to have the background bend around the subject), and instead, portrait shots should be free of geometric distortion to appear natural. This can be avoided by stepping back and zooming in, as follows:


(Credits to Rinaldo for teaching me! Don't worry, photography posts aren't going to take over the subject matter of this blog. I'm just too noob at it!)

Twitter Delicious Facebook Digg Stumbleupon Favorites More